


How to Tie a Tie
The Four-in-Hand Knot
Ready to learn how to tie a four-in-hand knot? You're in luck—requiring only seven simple steps, this commonly used knot is one of the easiest to tie and is incredibly versatile. Featuring a small, asymmetrical knot, the four-in-hand knot looks best with a button-down collar or a point collar, providing men with a classic business casual look. The four-in-hand knot can be worn with a spread collar, but, given its smaller size, a more full-bodied knot is usually preferred.
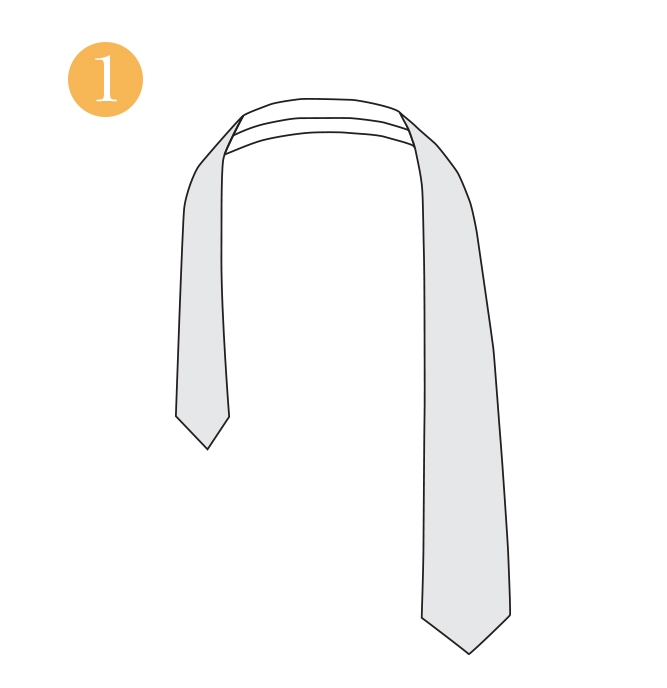
 Drape tie around your neck, extending the wide end about 12 inches below narrow end.
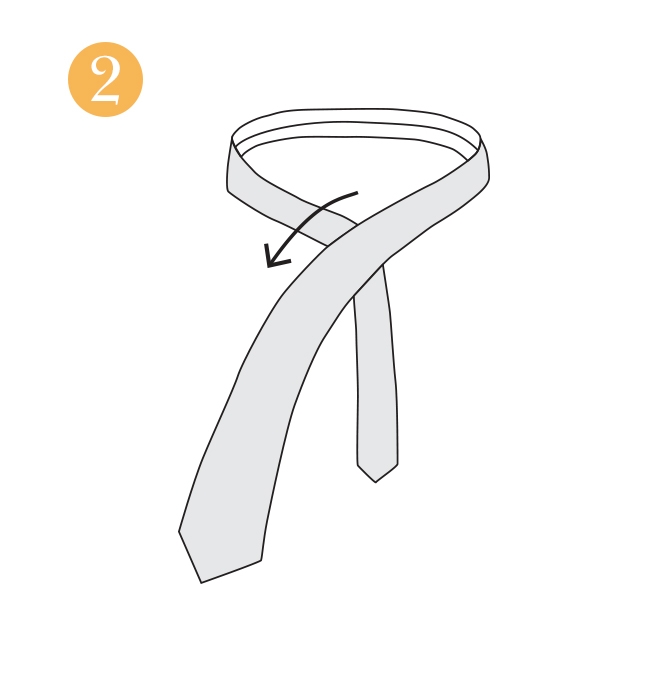
 Cross wide end over narrow.
 Continue around.
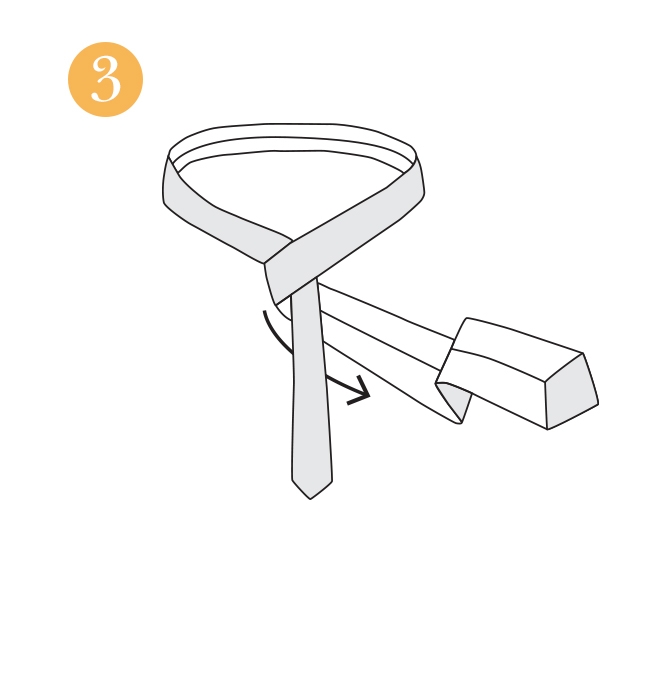
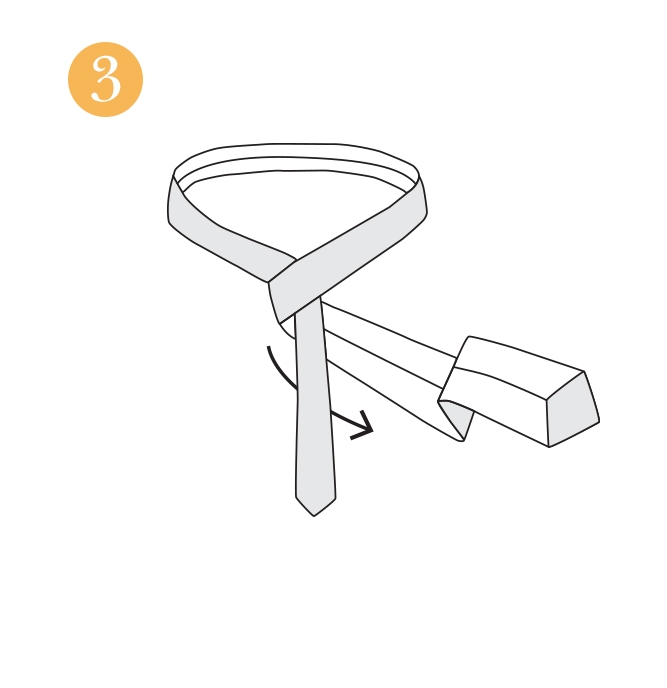
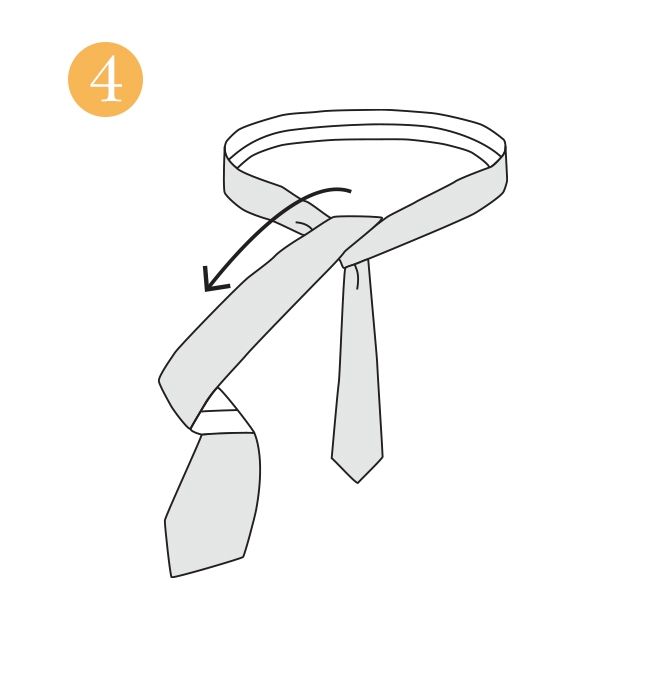
 Pass wide end across front of narrow once more.
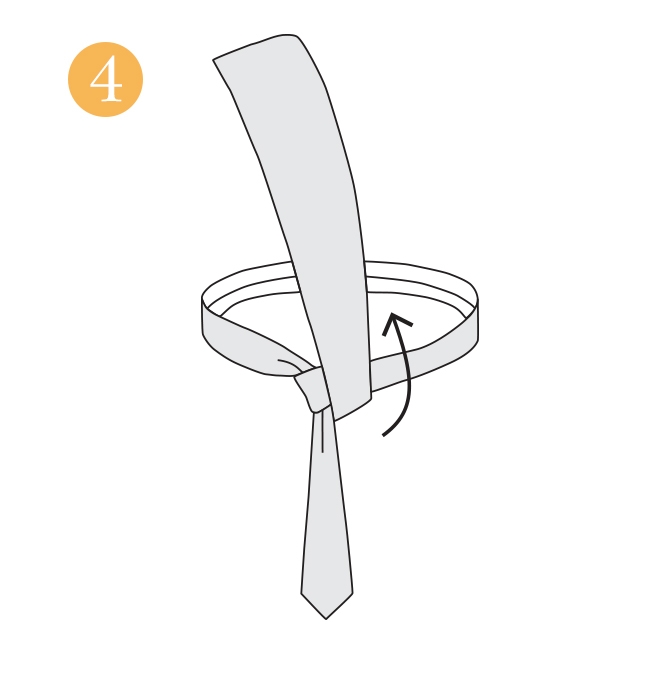
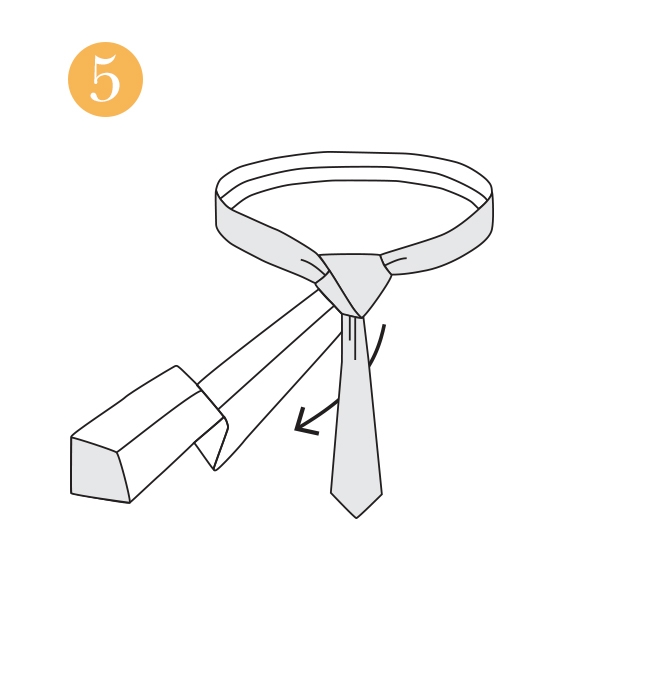
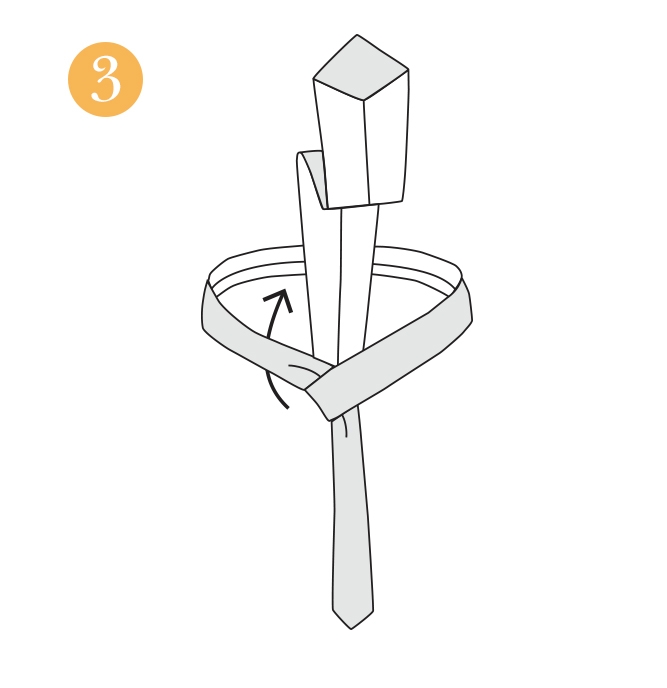
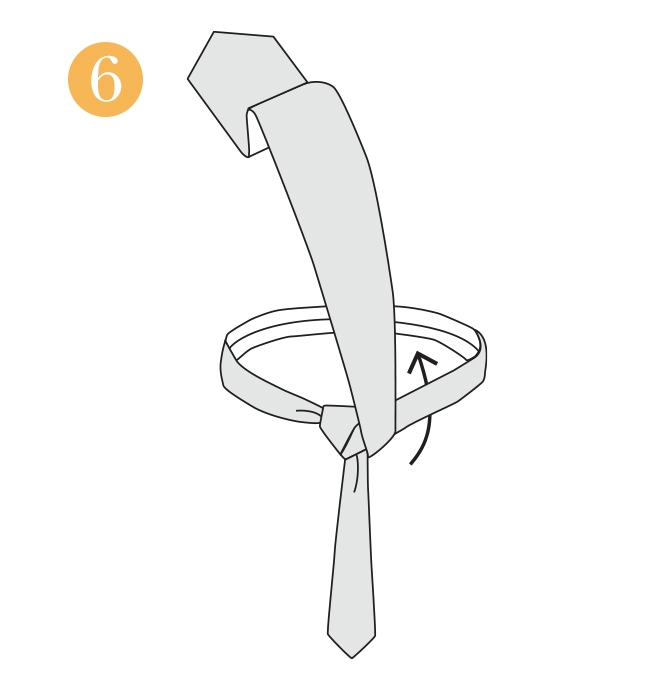
 Pass wide end up through loop.
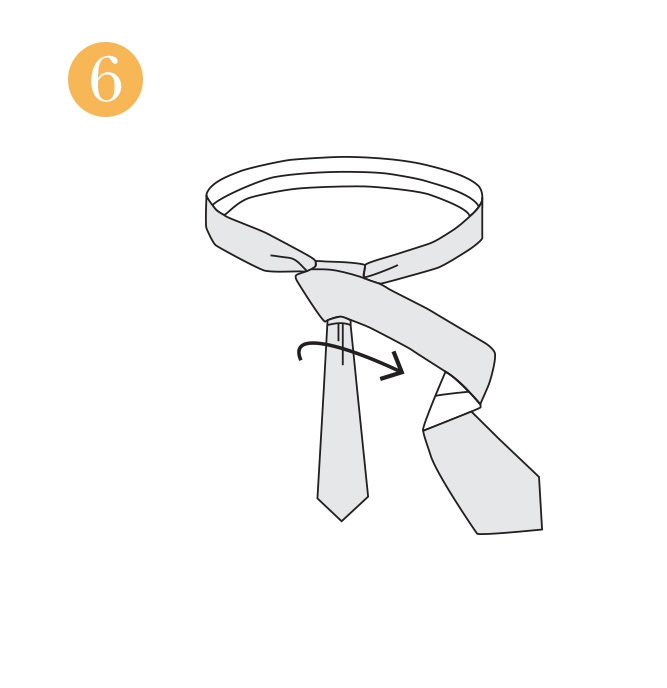
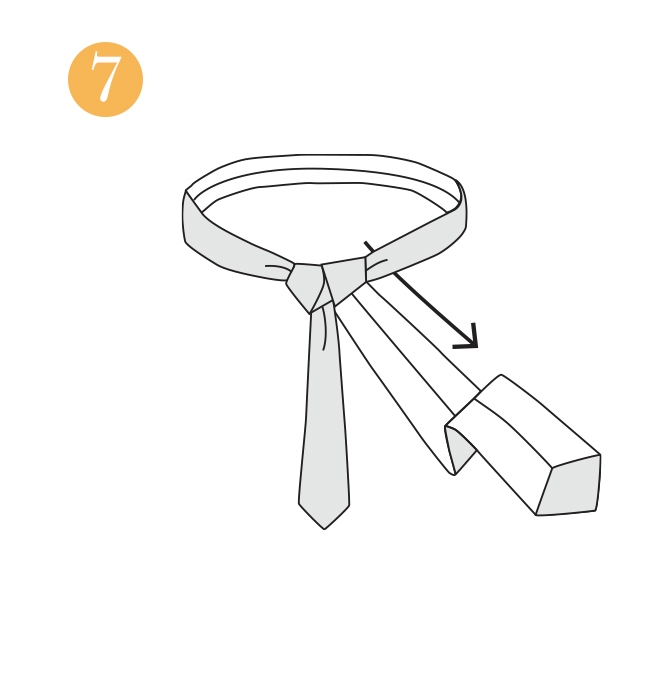
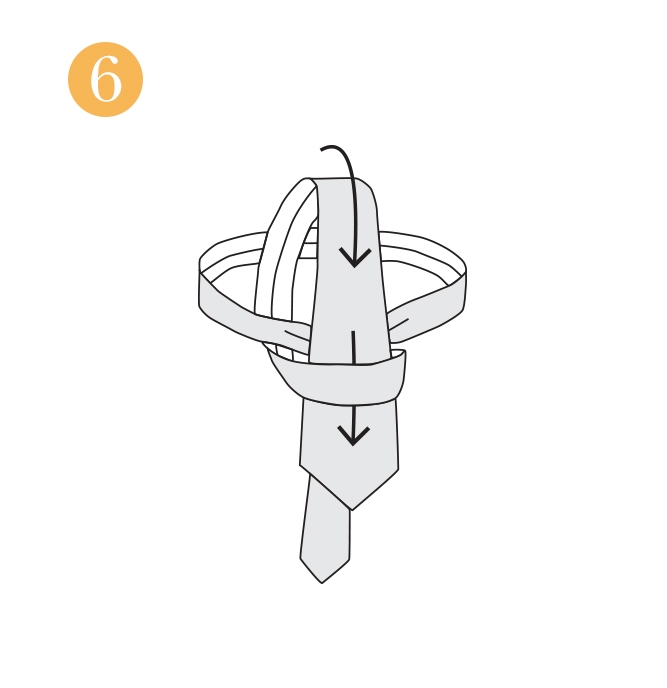 Holding front of knot loose with index finger. Pass wide end down through loop in front.
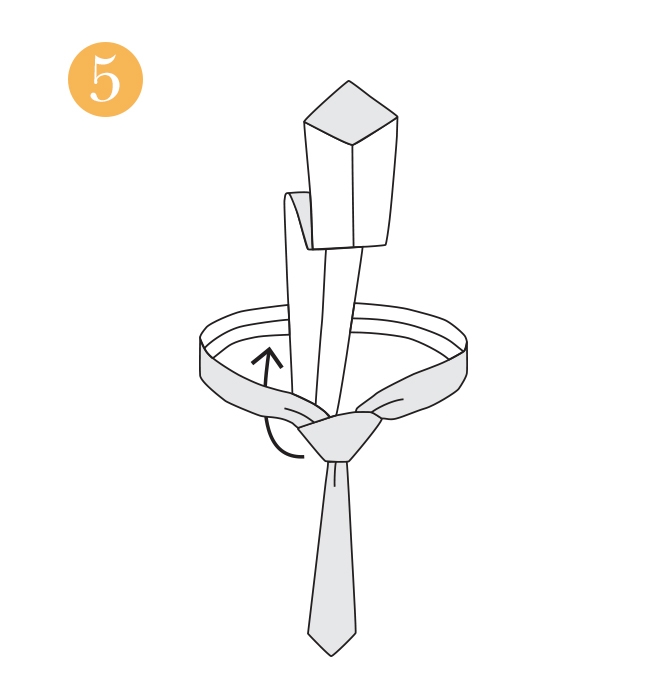
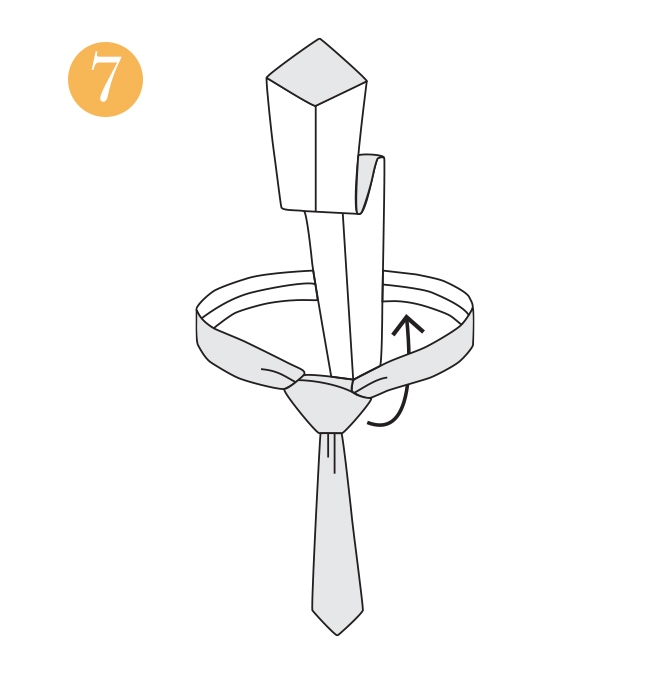
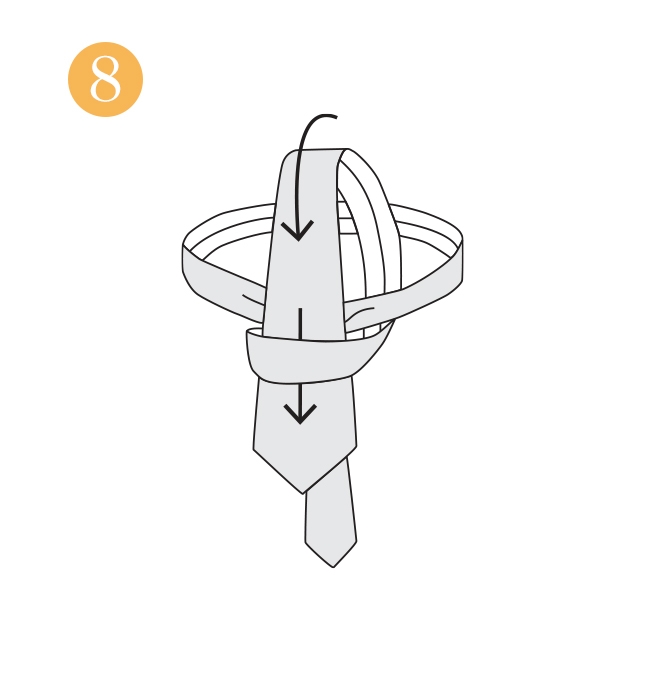
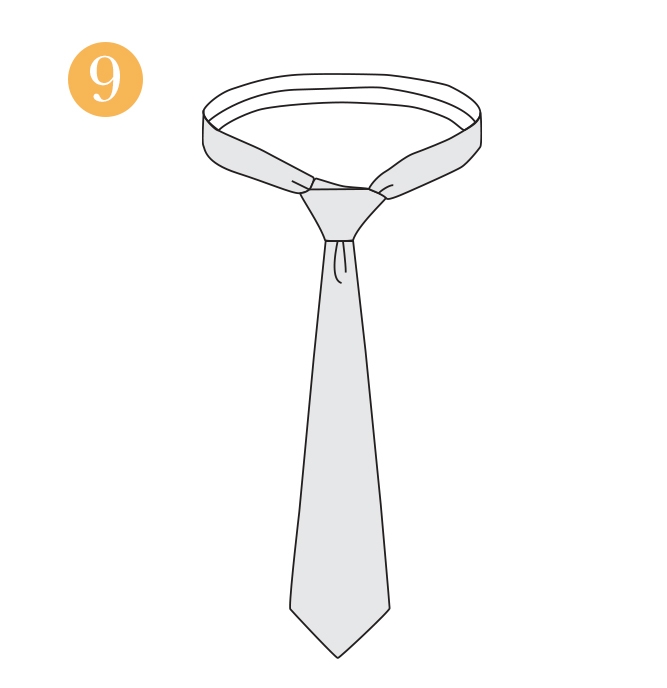
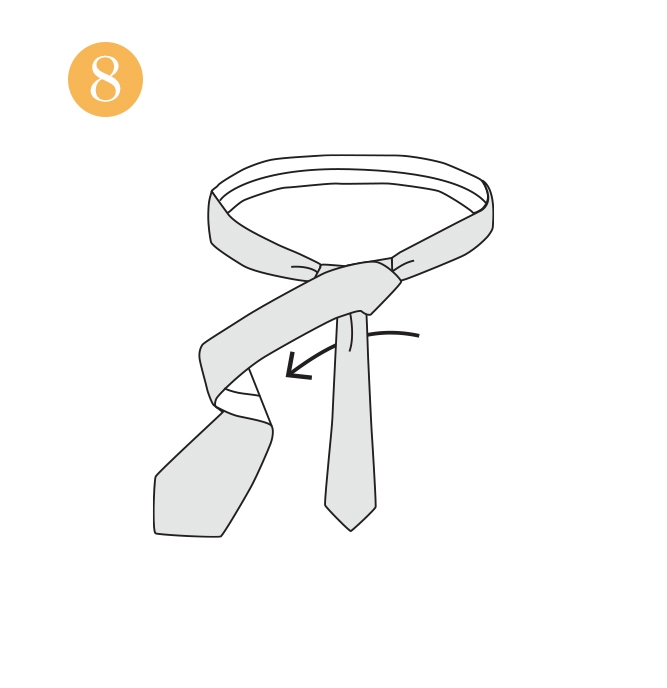
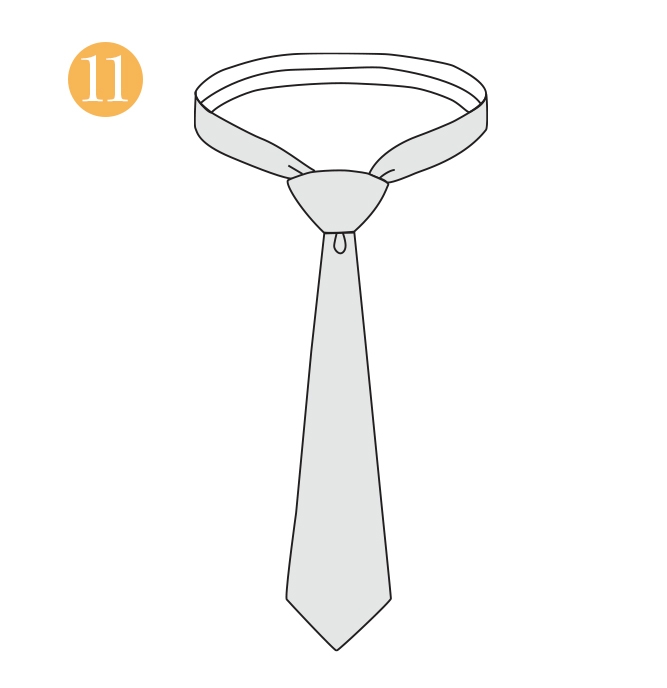
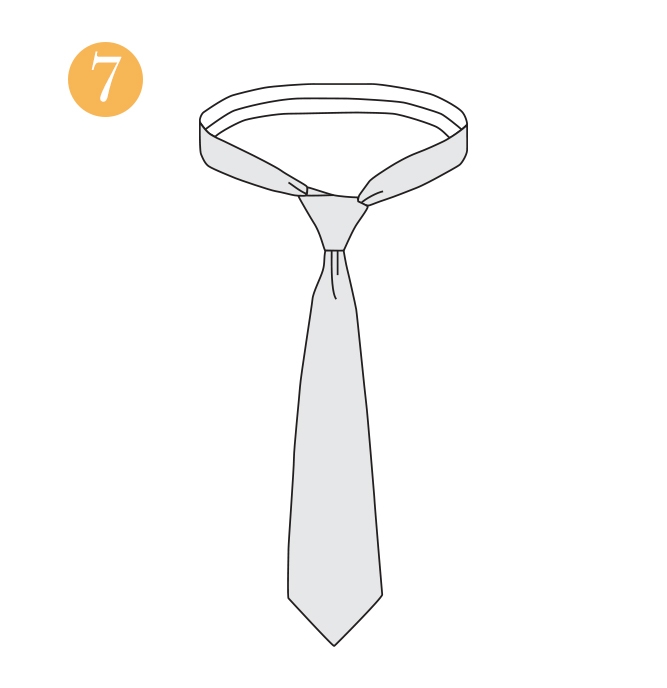 Remove finger and tighten knot carefully. Draw up tight to collar by holding narrow end and sliding knot up snug.
The Half Windsor Knot
Slightly more difficult than the four-in-hand knot, the half Windsor knot is also one of the most popular tie knots for men. Recognized for its medium-sized knot and symmetrical shape, the half Windsor knot pairs best with medium spread collars, point collars and button-down collars (though for this collar a four-in-hand knot is usually preferred), and is adequate for both casual and formal occasions.
 Drape tie around neck extending the wide end about 12 inches below narrow end.
 Cross wide end over narrow.
 Continue around the back.
 Bring up and turn down through loop.
 Pass wide end around front in the opposite direction from the first cross (step two).
 Holding front of knot loose with index finger. Pass wide end up through the neck loop behind the knot.
 And down through loop you’ve been holding. Now tighten carefully and draw up to collar.
 Pull down through loop in the front of the knot.
 Tighten carefully and draw up to collar.
The Full Windsor Knot
With a slightly larger knot than the half Windsor, the full Windsor is a more advanced way to tie a necktie. More simply known as the Windsor knot, but sometimes called a double Windsor knot, this tie produces a wide, symmetrical and triangular knot, making it an ideal match for dress shirts with spread collars or cutaway collars. Plus, a properly tied full Windsor knot is extremely comfortable to wear and projects confidence and power. A full Windsor knot is best suited for formal events, such as weddings, job interviews and business presentations, but, if you want to make a statement, can be worn in less formal settings as well.
 Start with the wide end of the tie on the right and the small end on the left.
 Cross wide end over narrow to the left.
 Bring wide end up into the neck loop from underneath.
 Pull down, around (to your left).
 Go behind narrow end and up to your right.
 Point the wide end up towards your face.
 Pull through the neck loop again.
 Wrap that wide end around the front of the triangle you made (keeping your left index finger and thumb placed loosely on the front of it).
 Bring wide end up through loop behind the triangle.
 Down through the loop you just made in front.
 Complete by pulling down. Tighten and draw up knot snug to collar.
Which tie knot is appropriate?
Every style-conscious man needs to know how to tie a necktie properly. Whether you’re learning how to tie a tie for the first time—or just need a little refresher—our step-by-step guide is here to show you how to tie the most popular tie knots and which collared shirts complement each knot. Choose your desired knot and get practicing!
Which tie knot should I use?
When choosing a tie knot, you must consider your shirt collar type. Generally, a half Windsor knot or full Windsor knot goes best with wide spread collar shirts, while a four in hand Knot is best paired with button-down or point collar shirts. If you are ever unsure of which collar shirt goes with which tie knot, a medium spread collar shirt can be worn with any tie knot.
What is the easiest tie knot to tie?
The easiest tie knot to tie is the four-in-hand Knot. For anyone just starting to learn how to tie a tie, the four-in-hand knot is the perfect knot to start with. It’s easy to tie, but also the most versatile knot, and is perfect for any business casual look. If you want to start with the basics, learn how to tie a four-in-hand knot.
What is the fanciest tie knot?
Among the most common types of tie knots, the half Windsor and full Windsor are generally considered the most formal, with full, symmetrical knots that complement a wide spread collar. If you’ve mastered the basics, you can try out some more unique tie knots like the Eldredge or Trinity knot.
Where should a tie end?
The proper tie length has changed over the years. In common opinion, ties should end above your trouser waistband and never pass the middle of your belt buckle. If the thinner side of the tie happens to be longer than standard, you can always tuck the tie end inside your dress shirt by inserting it in between two buttons.
How do you tie a tie step by step?
To master any tie knot, it's important to follow every step precisely. This way you ensure the end result is neat and looks like the knot you want. You can find out how to tie a four-in-hand knot, half Windsor knot and a full Windsor knot using our Paul Fredrick Tie Guide below.
Shop our new tie collection. Click Here